All about Dosbox, operation, starting, instructions, sound config and more !
- What is DOSBox ?
- Where does the name come from?
- Which games are supported ?
- Which OSes are supported ?
- Links to interesting websites
- Info about starting with Dosbox
- Infos about control Dosbox
- Dosbox step by step guide with screenshots
- DOS commands in Dosbox
- German keyboard layout with internal program
- Dosbox completely in German with external programs
- Accelerate Dosbox !
- keyboard shortcuts
- Gravis Ultrasound Emulation
- Info about CVS versions of Dosbox
- Play over network with Dosbox
What is DosBox ?
DosBox is an emulator that emulates a complete PC.This means that everything from the BIOS to the graphics card is displayed (programmed) in the program language.
The project is now quite far, so that most of the old Dos games
run again on newer systems.
DosBox has many great advantages:
- You have the possibility to try out different soundcards
- Speed can be set during the game
- make screenshots
- Record wave files of the game
- 100 Hz refresh rate for Dos games and more (Dos has only max 70/60 Hz)
- Graphics filter for better graphics quality
- Each game can be assigned its own config file.
- Dosbox is freeware
- Simple memory handling (EMX,XMS,RAM size)
- No more problems with conventional main memory (640 KB)
- It is possible to take screenshots of old Dos based games
- It is possible to make video recordings of old Dos based games
Where does the name ?
come from?| The name Dosbox, is actually the meaning for the "MS-DOS command prompt" that has been used since the "operating system" Windows95. If you now let the prompt be displayed in a window, then the window is colloquially called a "Dos-Box". | 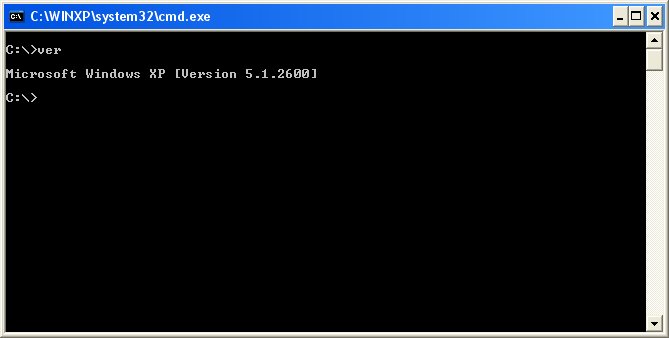 ( Dos-Box, Windows XP) |
Which games supports DosBox ?
In principle any game that was once programmed for "DOS" and can be started under this operating system. However, not every game can be 100% supported, as there are simply too many games that have their peculiarities.At the moment, however, VERY many games/programs are supported. I only know a few games that don't run at all. There is a compatibility database for a very large number of games. This database was created by the DosBox developers and is therefore very extensive. A look inside when a game doesn't want to run can't hurt. Games Compatibility List
On which operating systems läuft DosBox ?
Windows 95/98/ME/NT/2000/Xp, Linux , BeOS, Mac OS X, OS/2Links
- DosBox
There is also a good forum, in English language. - angryBoard
Here I have put an own forum online. If someone has a question about Dosbox, then come in here with it. - Dosbox Readme in English (Version 0.70)
- Dosbox Wikipedia(English)
- New Dosbox CVS releases of Dosbox DAUM Cafe
There are always relative new CVS versions of Dosbox, but they are not necessarily stable must, because they are developer versions. You can also find interesting information and updates / patches for Dosbox here.
Explanations/instructions for starting a game using DosBox
1. The first way to start a game with Dosbox is to drag and drop the file you want to run onto the Dosbox.exe. see here
2. The second possibility is to call a game by command. For example, this could look like this:
dosbox c:\colonization\viceroy.exe -c -conf colonization.conf
3. The third option is to specify within the "dosbox.conf" file which commands should be executed automatically when starting Dosbox.
4. The fourth option is to use a frontend for Dosbox. Here is a selection of frontends:
Step by step guide to operating Dosbox while it is running.
While Dosbox is running there are some keyboard shortcuts you should know to use the program.| Shortcuts | Description |
|---|---|
| ALT + RETURN | Switches to the full screen mode of Dosbox or from full screen mode back to window mode |
| ALT + PAUSE | Pauses the emulator, like pause and play with music, etc... to continue press ALT PAUSE again |
| CTRL + F1 | Starts the Keymapper, here you can define what should be played back within Dosbox when pressing the key on the keyboard. Attention ! The changes are saved permanently. |
| CTRL + F4 | Updates the CD or floppy image that is mounted. |
| CTRL + F5 | Saves a screenshot. |
| CTRL + ALT + F5 | Starts and stops recording an AVI video from Dosbox. The file is then located in the subfolder "capture" in the Dosbox directory. |
| CTRL + F6 | Starts and stops the recording of a WAV sound file from Dosbox. The file is then located in the subfolder "capture" in the Dosbox directory.td> |
| CTRL + F7 | Decreases the frameskip. |
| CTRL + F8 | Increases the frameskip value, i.e. not all frames are calculated but which skips are calculated to make the game run faster (the game then jerks deliberately to save CPU). |
| CTRL + F9 | Shutdown Dosbox. |
| CTRL + F10 | Removes the mouse binding from the Dosbox window, so that you can use the mouse again in Windows. The mouse will no longer stick to the Dosbox window. |
| CTRL + F11 | If the CPU Cycles is forced to calculate the Dosbox, the game will run slower. |
| CTRL + F12 | Increases the CPU Cycles the Dosbox should calculate, meaning the game will run faster. |
| ALT + F12 | If you keep these two buttons pressed, then DOSBOX runs with 100% CPU power, i.e. it emulates as fast as it can. The game then runs unnaturally fast. This is especially good for fast forward in games that you cannot skip. For example in the game Colonization at the beginning. |
Step by step Instructions for starting a game with DosBox
| Step | Description | Screenshot |
|---|---|---|
1. download and installation |
First you download DosBox from the developer homepage. (Here a screenshot from 04.07.2006 in the picture the version 0.65)(Picture 1)
Then install it by double clicking on the setup file (DOSBox0.65-win32-installer.exe).
The target path of an installation is up to the user.(Picture 2) In my example I'll use the following path: C:\Programs\DOSBox-0.65 |  (Image 1) 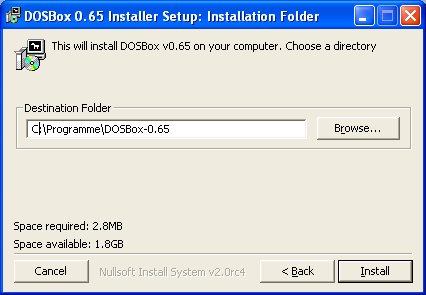 (Image 2) |
>2. start DOSBox |
Next you start Dosbox either via the shortcuts in the start menu of Windows or directly in Explorer with a double click on the Dosbox.exe
Now Dosbox opens and two windows should open. One window is the program itself and looks like a DOS window.(Picture 3) The other window is the program itself.
displays information, e.g. if you increase the Cycles(speed) or make other settings (Screnshot,Video Capture,etc....). In the Info window you can see if an action worked or not.(Picture 4) |
 (Image 3) 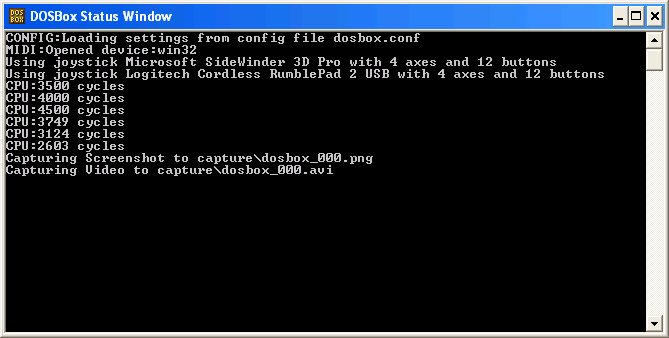 (Image 4) |
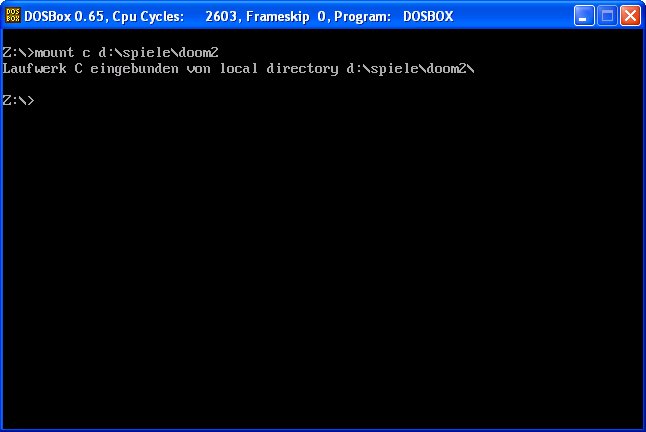
3. mount a directory |
Now you should mount the directory of the game you want to start.(Picture 5) The command to mount is:
Like, for example: If you want to mount a directory that has a name with more than 8 characters, just put the path in quotation marks. The same must be done if there is a space in the name.(Picture 6) |
 (Image 5)  (Picture 6) |
4.Start the game / Program |
If you have now mounted the desired directory, then you can start the game, you only have to start the .EXE (Executable). If you don't know the name of this start file for this game, you can look it up in Explorer or type DIR /P, so you get all files in one directory.(To show only .EXE files, type DIR *.EXE in)
You just need to enter the name of the correct file to start it. FOR EXAMPLE: The program or game should then be started. If not, then see further at point 5. | .
 (Image 7) |
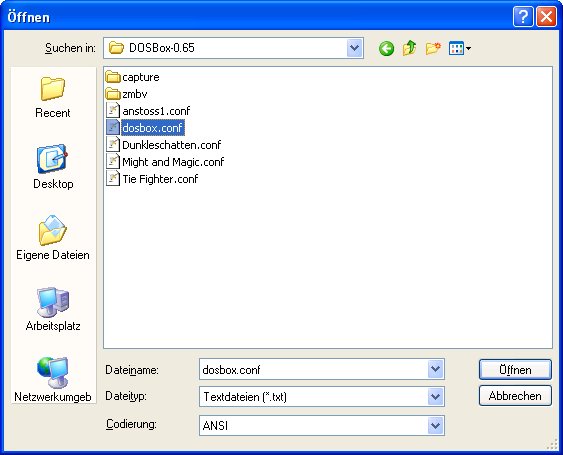
5. configuring the .CONF file |
If you don't want to start a game, it may be due to the settings in the configuration file, e.g.: "DOSBOX.CONF"
There you can set many things, from memory management to CPU emulation, or using graphic filters. It is also possible to enter commands under [autoexec], which should be executed automatically when starting on Dosbox. (e.g.:Mounting a drive,etc...) |
 (Image 8) 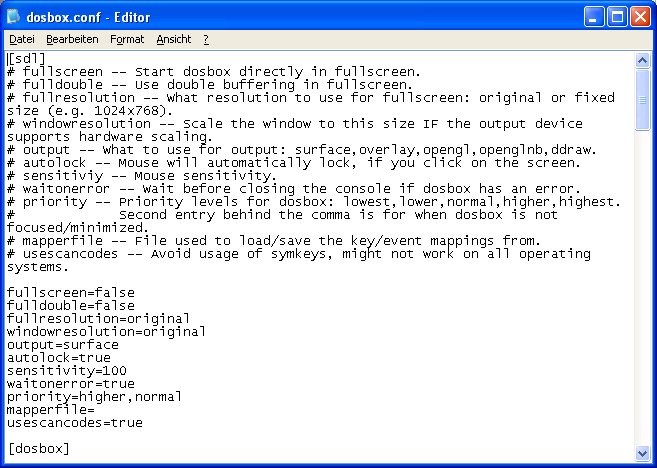 (Image 9) |
6. Who helps if something doesn't work ? |
We recommend to first read the README file to solve the problem. There are also many forums where you can ask for help. |
DOS commands in Dosbox
Here are a few helpful tips for using Dosbox.
| Command | Significance | Example |
|---|---|---|
| cd | (Change Directory) Change to another directory | cd c:\games\colo cd games |
| It is also allowed within Dosbox to specify directory names which contain a space in the name, you then specify the directory in quotation marks. | cd "c:\old games\Simcity" | |
| cd .. | Goes back one level in directory structure | cd .. |
| cd \ | Goes back to the lowest level in the directory structure | cd \ |
| dir | (Directory) Displays a list of the files in the current directory | dir |
| There are also the following parameters: /w -> Shows all files side by side /p -> Shows all files page by page It is also possible to display only certain files by using the asterisk as placeholder. So you only see files ending with.exe or .txt. | dir /w dir /p dir *.exe dir *.txt | |
| mem | (Memory) Indicates the memory usage. | mem |
| Other tips in handling Dosbox | ||
| Word Completion | The remaining letters of a filename are added. this saves paperwork and makes working much faster. | Enter the first letters and press TAB. |
Change keyboard layout to German (internal programs)
| Step | Description | Screenshot | ||||||
|---|---|---|---|---|---|---|---|---|
1. loading of the internal Keyb program |
To get the german keyboard layout, enter KEYB GR immediately after starting Dosbox. This will load the German keyboard layout. But be careful, the Y is a Z in the English keyboard layout. The parameter GR after calling the program KEYB specifies the country whose keyboard layout is to be loaded. In this example GR=DEUTSCHLAND is used. (see below) |

(Figure 1) Dosbox | ||||||
Overview of country abbreviations |
| |||||||
Change keyboard layout and comments in German (external programs)
| Step | Description | Screenshot | ||||||||||||||
|---|---|---|---|---|---|---|---|---|---|---|---|---|---|---|---|---|
1. download and installation(unpack) |
First download the following archive -> German language for Dosbox. After that you have to unpack the files (picture 1). For unpacking you need a packing program like WinRAR (Shareware) or 7 Zip (Freeware). The files must be unpacked into the installation folder of DosBox. I installed my Dosbox e.g. in the following path C:\oldie cd\Tools\DOSBox-0.65\ . | 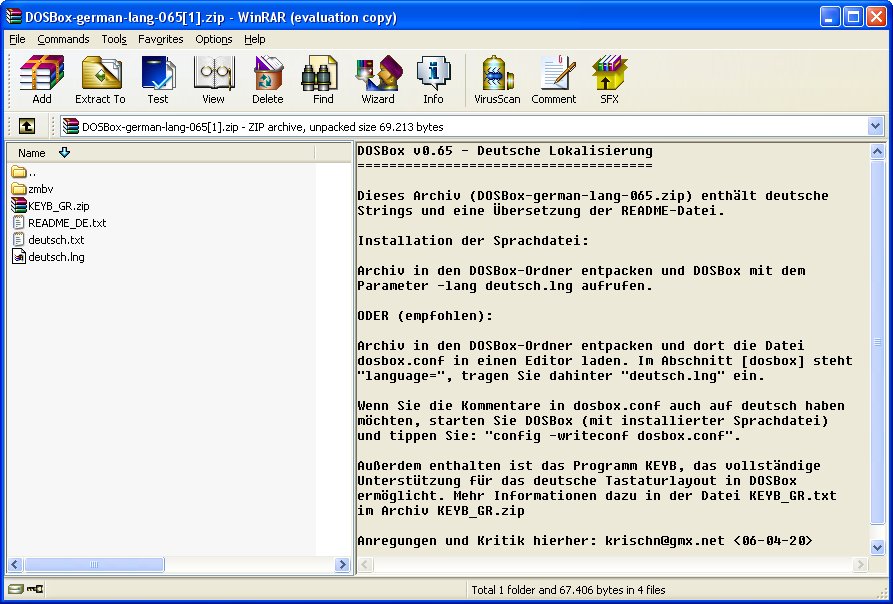
(Picture 1)WinRAR | ||||||||||||||
2. german language in Dosbox |
Now that you have the files in your DosBox directory, the first step is done. The archive also contained a German version of the Readme file. To have all comments in Dosbox in German you have 2 possibilities to do this. 1. You start Dosbox with the following call "C:\oldie cd\Tools\DOSBox-0.65\dosbox.exe - lang deutsch.lng"(Replace the path with your own if necessary) The best way to do this is via the "Command Prompt" (fig. 2)+(fig. 3) or you can create a small .bat file to call Dosbox in the future. (Simply copy the start string above into a .txt file and then change the file extension to .bat) Or create a shortcut (e.g. on the desktop) to Dosbox.exe and add the option-lang deutsch.lng to the properties of the shortcut.
| 
(Figure 2) Command prompt 
(Figure 3) Command prompt | ||||||||||||||
2. continued |
2. (recommended) In the Dosbox.conf enter that this file "deutsch.lng" (that is the language file) will be selected as the language file in the future. Open the file "dosbox.conf" in the Dosbox folder with a text editor and search for the location language=. (Fig. 4) Now simply write the name of the language file behind the equal sign. This will look like language=deutsch.lng (Figure 4). However, it is necessary that you have the file in the "DosBox" directory, as indicated at point 1 (see above). So every time DosBox is started, the specified language file is loaded. | 
(Figure 4) dosbox.conf / notepad++ | ||||||||||||||
3. German keyboard layout |
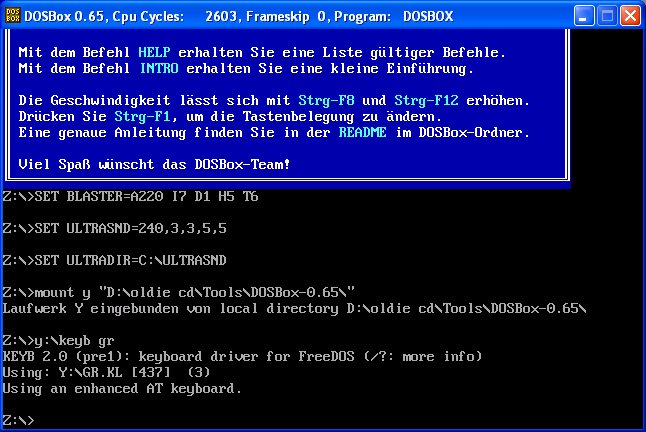
To get a German keyboard layout in Dosbox in a simple way you don't have to do anything else than use the program keyb.exe (Under GPL license, Archive), including the language file gr.kl (language file for the program keyb.exe)(both contained in the Archive) For this you have to mount the folder within Dosbox, where the program KEYB is located (+language file). After starting DosBox you do this with the following command: mount y "D:\oldie cd\Tools\DOSBox-0.65\" (Replace the path with your own if necessary) (Figure 5).Help for English keyboard layout :
| 
(Figure 5) Dosbox | ||||||||||||||
3. continued |
If you have mounted the correct directory, change to the corresponding drive Y :and issue the following command KEYB GR. After that you have a German keyboard layout, if everything worked out.(Picture 6)
| 
(Figure 6) Dosbox |
Accelerate DosBox / Tuning Tips
There are several ways in DosBox to speed up a game (generally DosBox).
Often a game "jerks" or the sound "stutters". Then the emulation of Dosbox is usually too slow to display all sound or graphic data.
There are some settings in the dosbox.conf (config file) which affect the speed of Dosbox.Dosbox emulates the CPU, the sound hardware and the graphics card. Also some other things, joystick, IPX for network connection etc... This all happens at the same time and every step the DosBox has to do reduces the CPU time. I.e. basically you should have a look at the Dosbox.conf file and switch off everything you don't need or add a none/false. The less you have to emulate, the faster DosBox becomes. Most CPU time is spent emulating the graphics. This is the area where you can save the most time.
| Configuration | Explanation | |
|---|---|---|
frameskip=0 | The higher the number, the more images are omitted -> the faster. however, the playability of a game suffers as well. e.g. mouse jerking, sound stuttering, etc... Usually a setting of 1 is recommended to speed up a game, so in most games you have absolutely no loss of quality, but it is different from game to game. The best is to try it out during the game (see at the end of the page) The normal "frame rate" of Dosbox is 70 fps with Frameskip 1 there are only 35 fps left.(2 -> 23,3 ; 3 -> 17,5) That means if you set the number even higher you create a "jerking" in the game. | |
aspect=false | To increase the speed this value should be set to false. With true the resolution of many old games is increased from 320*200 to 320*240, which again costs CPU time. | |
scaler=normal2x | To increase the speed this value should be set to false. The higher the scaling (x2/x3) the more CPU time will be used, depending on the filter type. Best to try. | |
fullscreen=truefulldouble=falseoutput=surface | You should note when playing in fullscreen mode that you will have the output value set to Surface. In window mode the Overlay setting is faster. fulldouble should also be set to false to get the fastest performance. If you want to run Dosbox in windowed mode, you should reduce your desktop color depth to 16 bit to get more performance in Dosbox. |
|
core=dynamic | Here dynamic should be selected, this is the best and fastest setting, here you can gain a lot of speed. The prerequisite is that the used PC is x86 compatible. However, the dynamic setting is not compatible with all programs and games. But it is worth testing this setting in any case. All Mac users should choose simple.If a game with dynamic core does not want to run, you can try another trick to get the game to run. Many games running in "Protected Mode" use the DOS4GW.EXE Dos extension. There is an alternative called DOS32A.EXE which is smaller and much faster than DOS4GW.EXE, in addition it is even better compatible with Dosbox.To use the DOS32A.EXE instead of the old DOS4GW.EXE there are several ways:
| |
cycles=auto | The setting auto causes the DosBox to automatically try to make the most appropriate setting of the cycles. Doesn't have to fit 100% with all games/programs, but it often relieves you of the tedious task of trying out how many cycles are best for a game. In some games a fixed number of cycles is better. you have to try it out for yourself. | |
nosound=true | This setting causes no more sound effects to be played back. This means that they are emulated anyway, so you should turn off the sound output in the configuration/setup of the game to speed up the game. Normally it is not necessary to turn off the sound completely. | |
rate=22050 | You can select the sound quality for all soundcard settings. The default value is 22050. If you now want to run Dosbox faster, you can set this value down to e.g. 11025. So you already gain a lot of performance, but the sound quality suffers a little. According to the developers, there is only little performance gain below 11025, so it doesn't make sense to set a lower value. | |
mpu401=intelligent | It improves the performance if you use the Mpu401 emulation instead of Soundblaster for the sound playback, but this must also be set in the game/program. The same applies to the sound quality as described above. | |
sbtype=sbpro1 | The emulation of a Soundblaster Pro is less complex than that of a Soundblaster16. For speed it is therefore advantageous to use Soundblaster Pro. | |
pcspeaker=false | PC Speaker is not required, so you can turn it off to save the resources of your PC. | |
tandy=false | If you don't want to use Tandy Sound, you can also select "false" here and switch off the emulation. | |
disney=false | see "tandy". | |
joysticktype=none | If no joystick is needed, you can also select "false" and release performance. | |
xms=true | Here also applies, the memory type which is not needed can be switched off. This is different from game to game and has to be tested. | |
ipx=false | As long as you don't want to play games in the network you can disable IPX support. The same applies to the emulation of a modem. |
Keyboard shortcuts
| Key combination | Function |
|---|---|
| Alt enter | Full screen mode on/off |
| Alt pause | Interrupt emulation |
| Enter | Resume emulation |
| Ctrl-F1 | Start keymapper |
| Ctrl-F4 | Change floppy disk image; Reread directory structure |
| Ctrl-F5 | Save screenshot (PNG) |
| Ctrl-Alt-F5 | Save screen output and sound as a video clip on/off |
| Ctrl-F6 | Write sound output in WAV file to/from |
| Ctrl-Alt-F7 | Recording OPL commands on/off |
| Ctrl-Alt-F8 | Record raw MIDI commands on/off |
| Ctrl-F7 | Skip frames/Frameskip -1 |
| Ctrl-F8 | Skip frames/frame skip +1 |
| Ctrl-F9 | Close DOSBox |
| Ctrl-F10 | Snap/unlock mouse |
| Ctrl-F11 | Slow down emulation (decrease DOSBox cycles) |
| Ctrl-F12 | Accelerate emulation (increase DOSBox cycles) |
| Hold down Alt-F12 | Unlock throttle (turbo button) |
Ultrasound Patches Install
Gravis Ultrasound (Wiki Link) was at that time (1990s) a sound card which was ahead of all others in terms of sound quality.
Dosbox makes it possible to use the better sound reproduction.
Basically, it is not difficult to install and use Ultrasound in Dosbox.
Here a guide how to enjoy better sounds with Dosbox (assuming the game supports this sound).
| Step | Description | Screenshot | ||||||||||||
|---|---|---|---|---|---|---|---|---|---|---|---|---|---|---|
Download of the GUS driver |
To enjoy Ultrasound you have to install some drivers, you can find them here FTP Server. All 6 files Download with the name gus411a.zip to gus411f.zip |  ( Image 1 FTP Server) |
||||||||||||
Unpack |
The 6 Zip files must now all be unpacked into one directory e.g. in : "C:\Gravis" |  ( Image 2 7Zip) |
||||||||||||
Configure Dosbox |
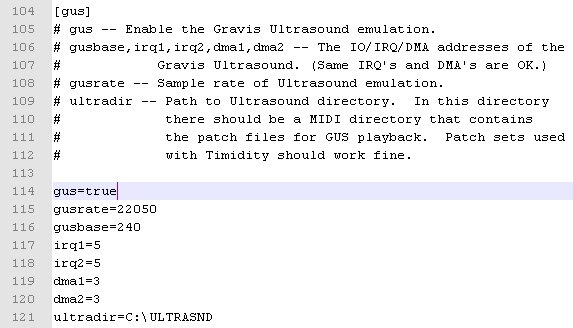
Before starting Dosbox you should make sure that the "GUS Sound" is switched on. Under [GUS] the line gus=true should be set to =true, then GUS is also activated. The following lines normally do not need to be changed. Otherwise you have to take care that the IRQ5 is not used by other devices at the same time, e.g. the Soundblaster. The second important line is this ultradir=C:\ULTRASND it is set there so Dosbox should search for the GUS drivers. This directory is already the default directory for GUS drivers, so it's best to leave it like this. |
 ( Image 3 dosbox.conf / Notepad++) |
||||||||||||
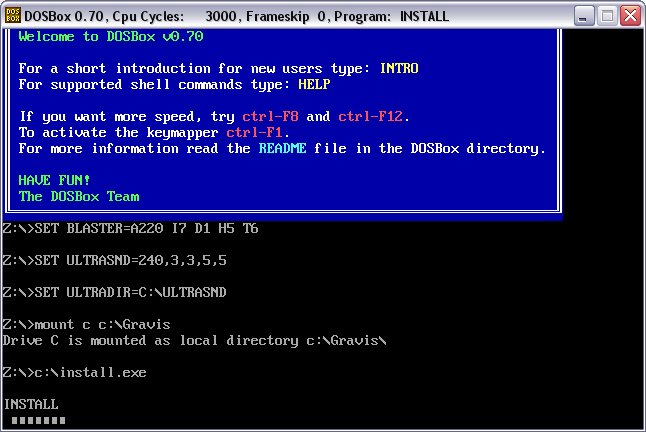
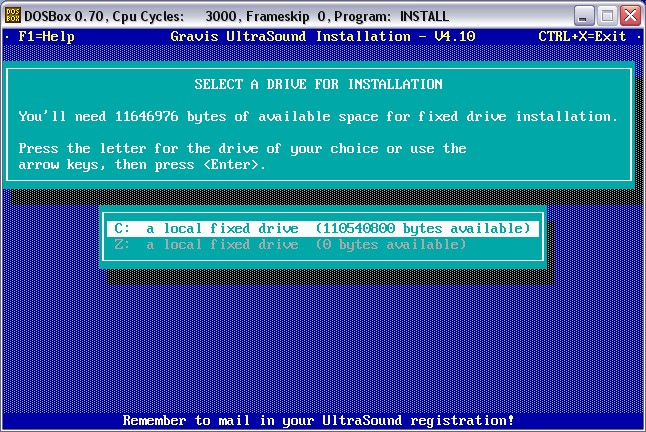
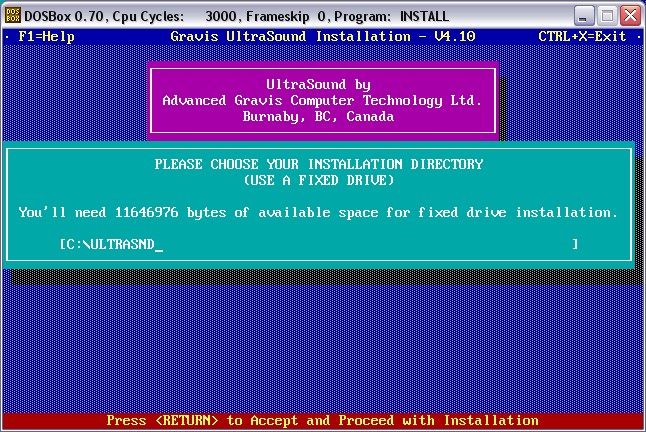
mount and install |
Now you start Dosbox and mount the directory "C:\Gravis" where the drivers are located with the following command:mount c c:\Gravis Then start the driver installation with c:\Install.exe |
 ( Figure 4 Dosbox 0.70) |
||||||||||||
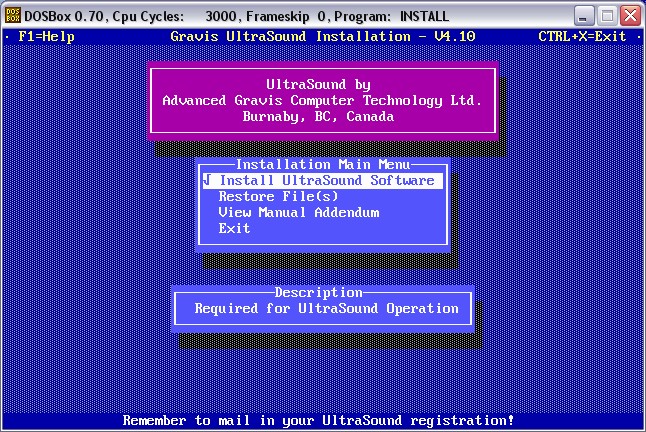
Installation guide Gravis Patches |
Through the installation you can simply click through with Enter. You should select the following points:
|
| ||||||||||||
Configuration, example in game "Tie Fighter" |
If the soundcard "Gravis Ultrasound" was selected in the game, it may look a little strange. As here at the example Tie-Fighter. But don't worry the sound works anyway. | 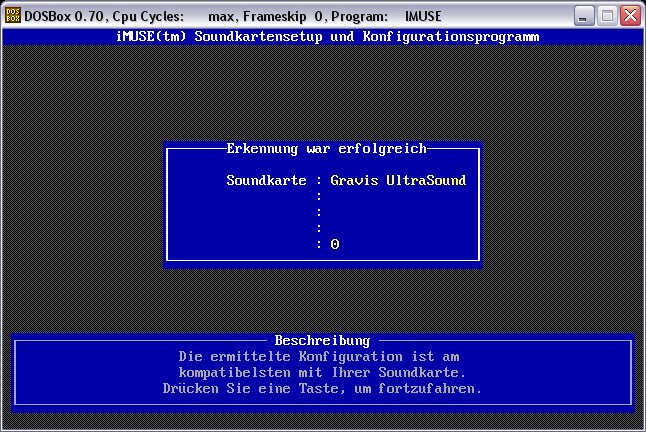 ( Image 10) |
||||||||||||
Sound Comparison Adlib<>F4-OP FM<>GUS |
The relatively low effort is definitely worth it! If you are not convinced yet, you can listen to some output sounds. As an example I took a piece of the intro from the game Tie-Fighter incl. Imperial March and the sound tests in the sound configuration program. |
|


CVS versions, what is this ? What's the use of ?
"CVS Builds means Concurrent Versions System, it is a version control system for programming projects (Wiki Link).
Dosbox and other software projects use such programs so that several people can work on one project without getting in each other's way.
Dosbox only ever releases stable versions 0.60, 0.65 and 0.70 were stable versions. The developers of Dosbox keep on programming at Dosbox.
You could say there are small subversions of the current 0.70 version e.g. 0.71, 0.711, 0.712 etc....
Since Dosbox runs under the open source project, anyone who wants to can take the source code and change it according to their needs.
So you get different CVS versions with different features compared to the "official" Dosbox in version 0.70.
CVS versions are more current versions, but also have more bugs than stable versions. There is no warranty or support for these unstable versions, so try them out at your own risk.Here are some CVS versions with links listed:
- AEP CVS versions of the official Dosbox versions. Beside these daily updated CVS builds there is also a version which speeds up the image output several times. Especially for 3D shooters.
Installation: Simply unpack files from the archive into the existing Dosbox directory and start. - DOSbox Daum Cafe On this page there is a CVS version with a menu in Dosbox , as well as Direct3D support and Glide Support for Dosbox.
- OpenGL support
- Direct3D support
- MT32 sound support
- GLIDE support
- Improved IPX network support
- PhysFS support
- Overscan Border Patch
- Gulikoza's page This CVS version includes the following changes from the official release:
- A possibility to change the CPU core during operation
- OpenGL support
- Direct3D support
- MT32 sound support
- Experimental SVGA Patches
- H-A-L 9000's Page Here are CVS versions with the following features:
- debuging support, which stores the log in the dosbox path.
- Parallel port support for direct printing.
- Serial port support to play a Dos game via null modem cable.
- IPX Support
- External tool:An IPX tunnel server
- Changelog of the current Dosbox CVS
Gaming over network with Dosbox
| Step | Description | Screenshot | |
|---|---|---|---|
1. configure the network support |
First you have to set in the configuration file *.conf that network support is active. The parameter ipx=true is responsible for this. Only the IPX protocol is supported. Netbios e.g. is not included in Dosbox. For this you would have to use an extra driver. |

(Figure 1) Dosbox Conf file | |
2. Start the IPX Server |
The IPX network in Dosbox always consists of one server and several clients that have to connect to the server. Accordingly we start Dosbox and enter the command ipxnet startserver to start the PC as IPX server. (see Figure 2) Dosbox uses the TCP/IP protocol to connect to another Dosbox computer. This means the IPX protocol is tunnelled through TCP/IP. |

(Figure 2) Start IPX Server | |
3. disable firewalls (Windows) |
As soon as the IPX server is started the Windows Firewall (here Win XP) asks if you should allow a connection. This should be confirmed with "Yes", otherwise the connection will not be established. The IPX support uses port 213 by default (according to the readme). You can also explicitly specify a different port number. (see below) | 
(Figure 3) Windows XP Firewall | |
4. Start the IPX client(s) |
The start of the client happens with the command:ipxet connect 192.168.1.9.After the command ipxnet connect the IP address of the client must be entered. In this example the server has the IP address 192.168.1.9. The own IP address can be found under Windows XP among other things with the command ipconfig, which you have to enter in the Dos prompt.When the connection is established, you can e.g. play a game against each other like e.g. Warcraft 1 Orcs&Humans. This works fine without any problems. |

(Image 4) Start IPX Client | |
5. overview of the network commands |
IPXNET STARTSERVER -> -> Starts the IPX Dosbox ServerIPXNET STOPSERVER -> Stops the IPX Dosbox ServerIPXNET CONNECT (IP address) (port number) -> Connects to an IPX Dosbox ServerIPXNET DISCONNECT -> -> Terminates the connection to an IPX Dosbox ServerIPXNET PING -> -> Outputs a status to all connected clients or a serverIPXNET STATUS -> -> Shows what role this PC has in server or client and whether started or stopped
|
||